What You'll Need
Make sure you have these ready before starting the setup. It takes about 5 minutes to gather everything.
Facebook / Meta Account
A personal Facebook account to log into Meta Developer Portal
Business Name & Details
Your company name and a contact email address
Phone Number
A phone number not already connected to WhatsApp (or use Meta's free test number)
Wagenius Account
An active Wagenius CRM account with admin access
Business Verification (Optional)
Required only if you want to upgrade to a production-grade account
Complete Setup Guide
Follow each step carefully. Screenshots are included at every stage to guide you visually.
Create a Meta Developer Account
Go to developers.facebook.com and log in with your Facebook account. If this is your first time, you'll be asked to register as a developer — just follow the quick prompts.
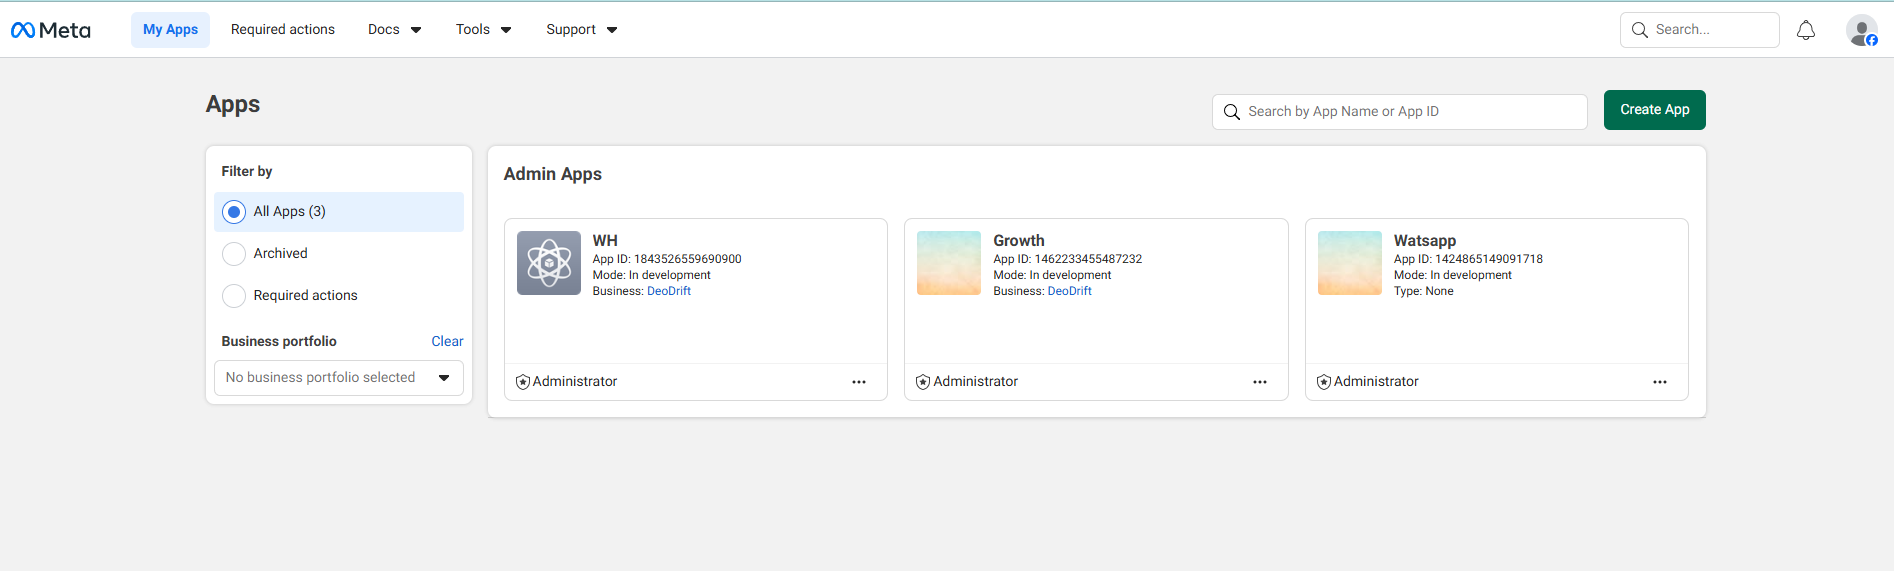
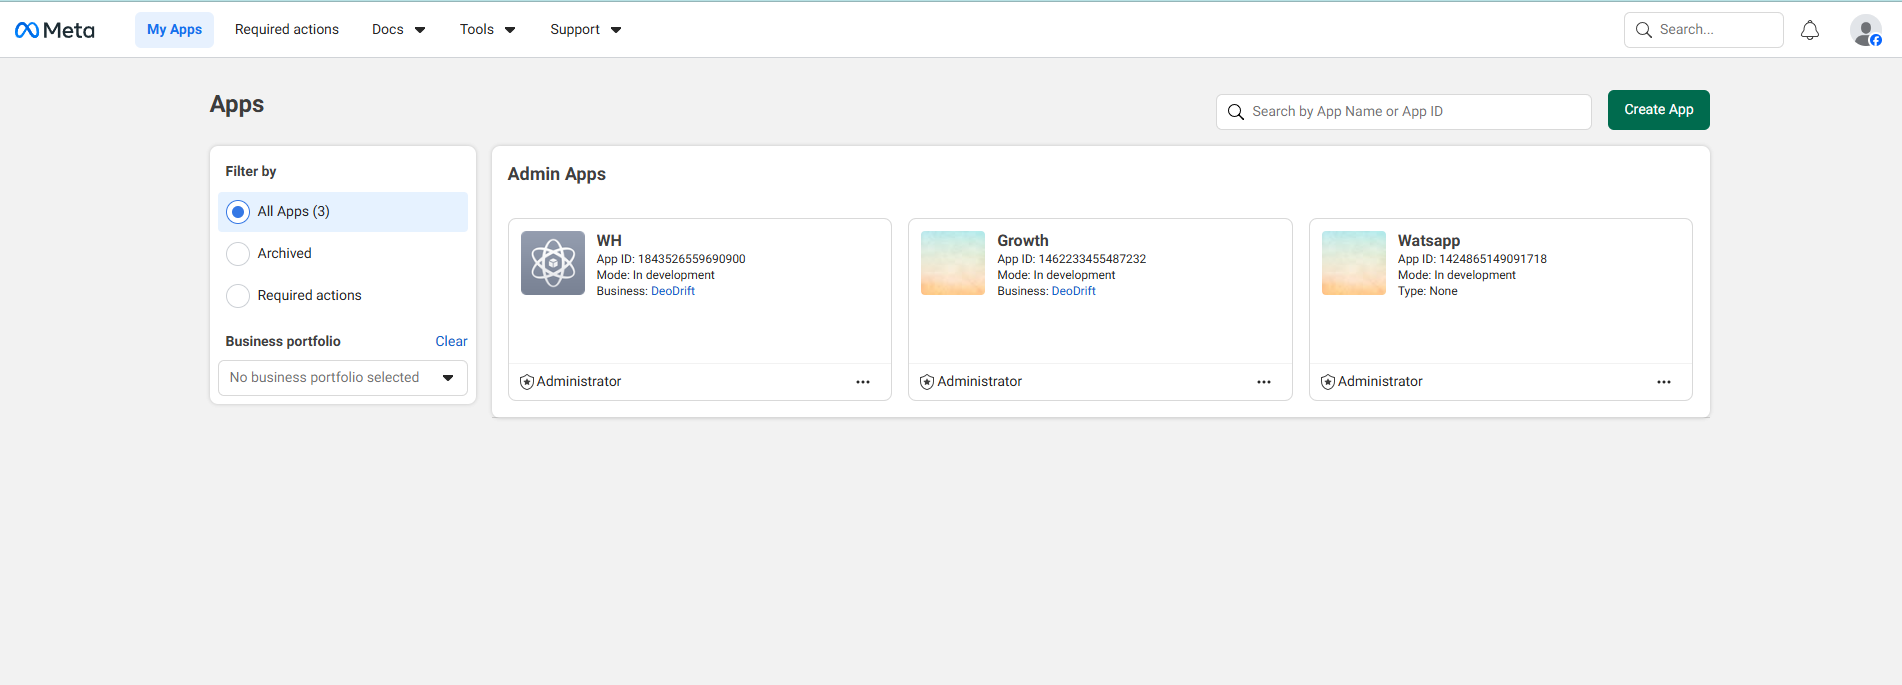
Create a Meta App
From your Meta Developer dashboard, navigate to My Apps and click the green "Create App" button in the top-right corner.
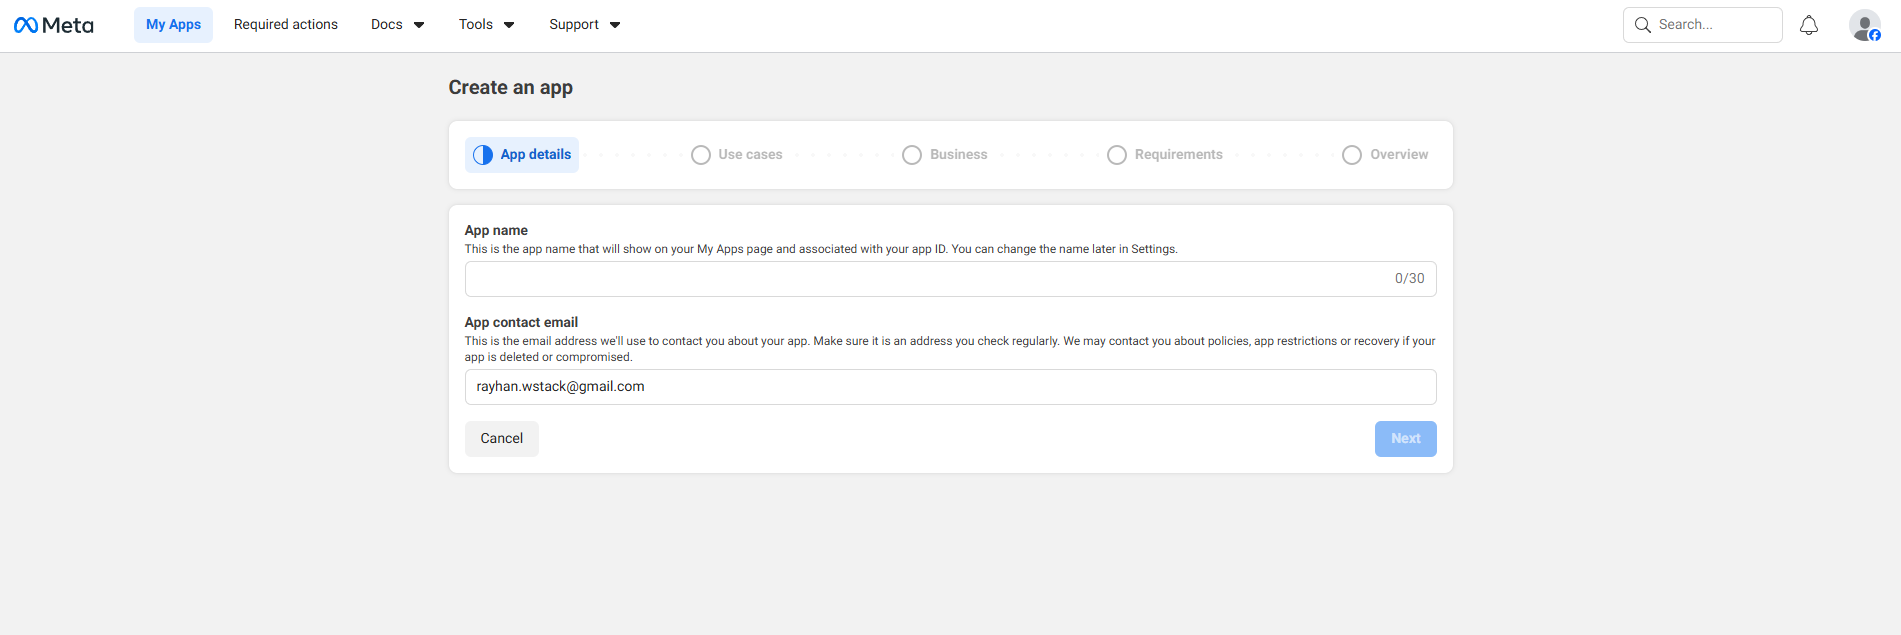
When prompted to choose an app type, scroll down and select "Other", then choose "Business" as the app type. Give your app a name (e.g. "MyBusiness WA") and enter your contact email.
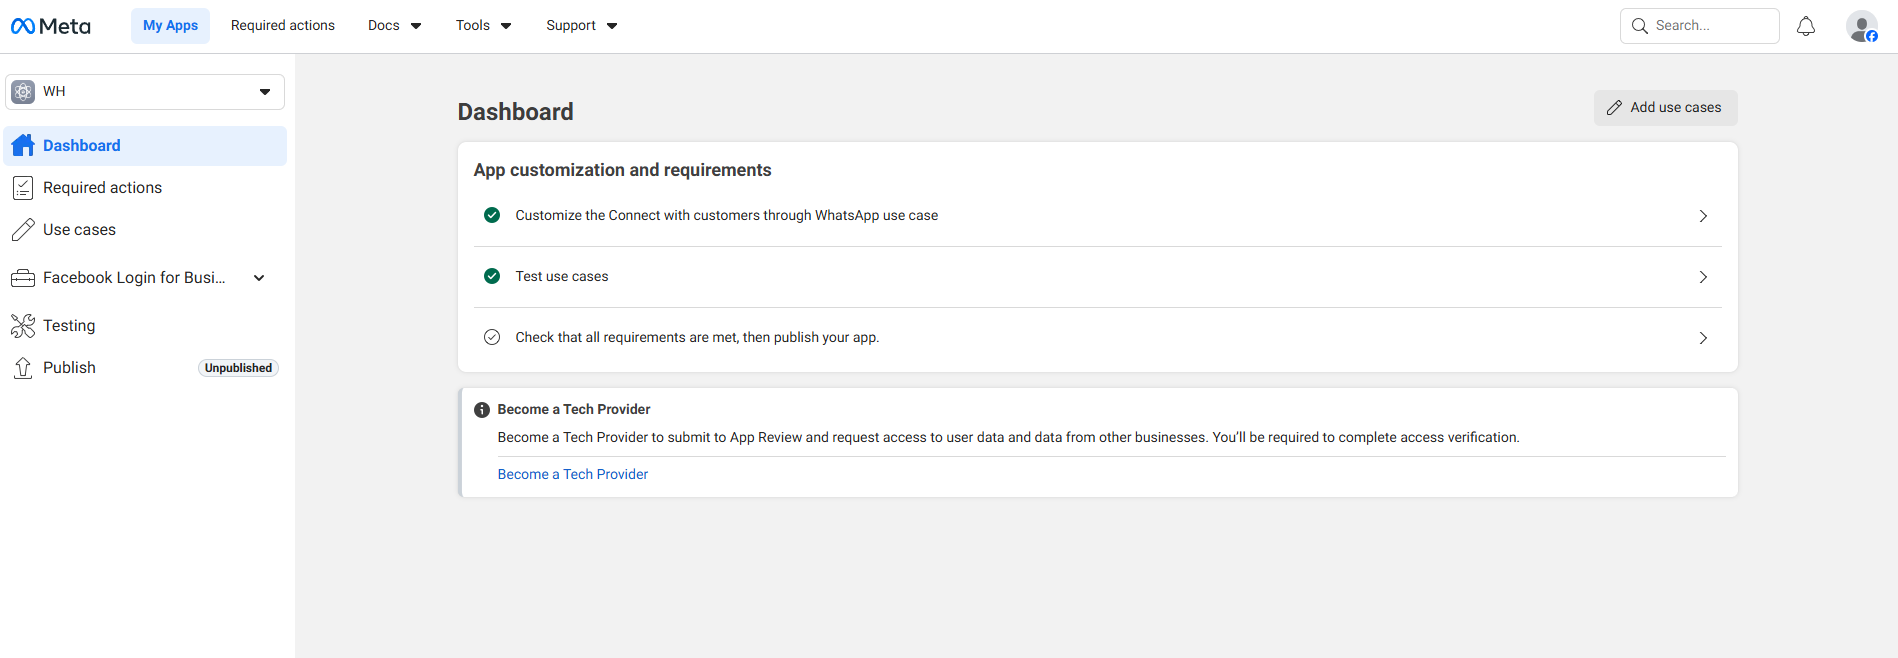
Add WhatsApp Product to Your App
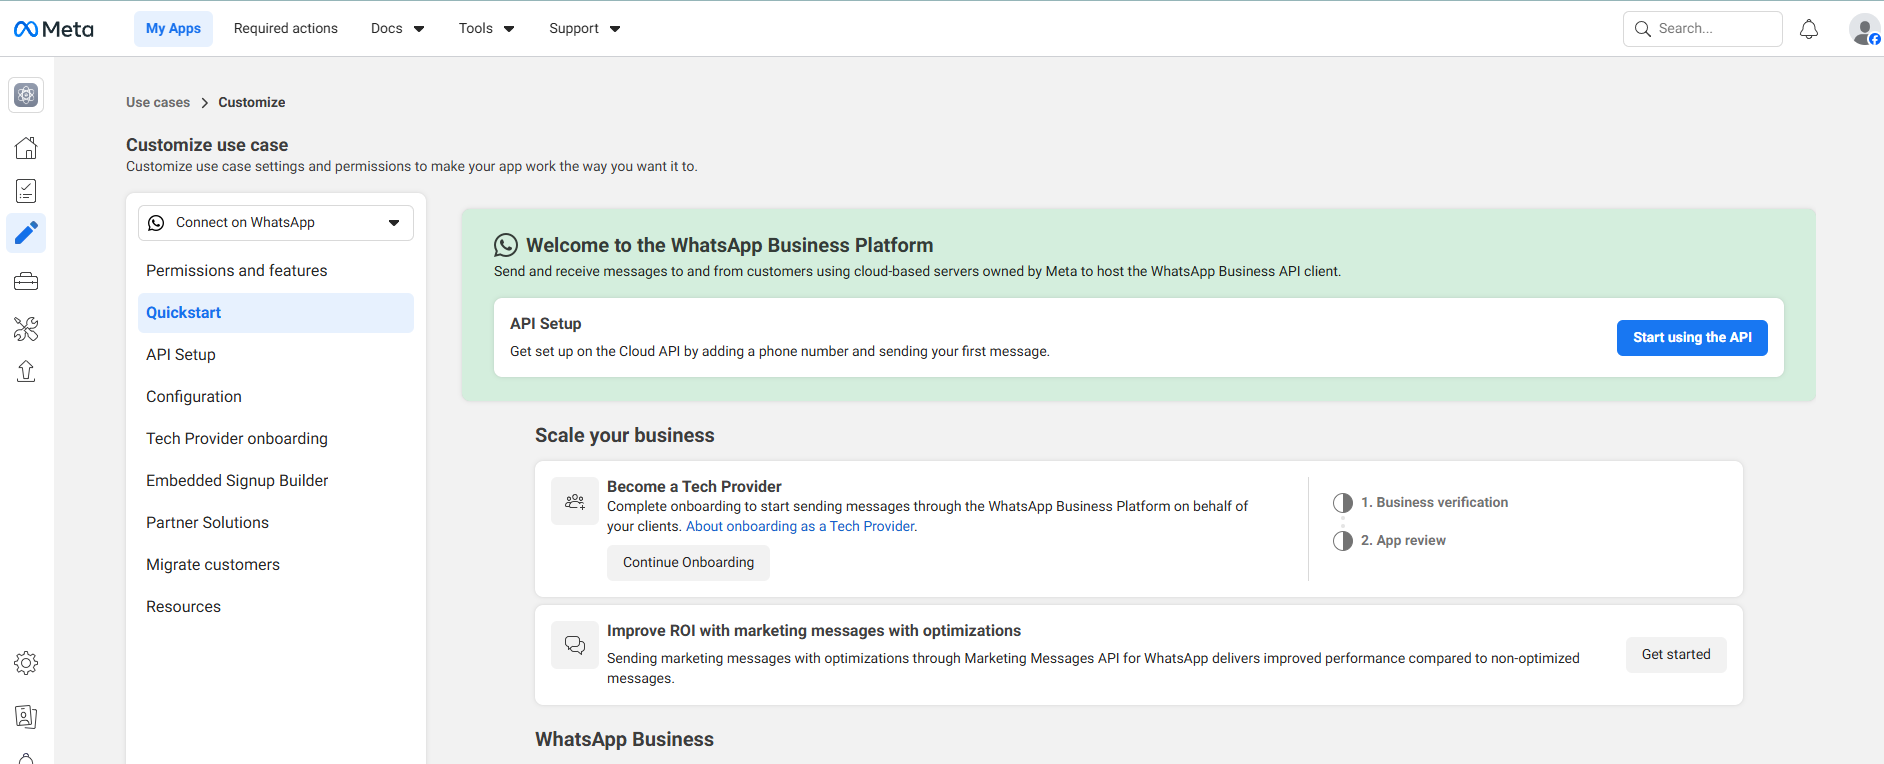
After creating the app, open it from your apps list. You'll see the app dashboard. Look for the "Customize the Connect with customers through WhatsApp use case" and click on it to get started.
Start Using WhatsApp API
You'll be taken to the WhatsApp Business Platform overview. Click "Start using the API" button to enter the API setup. This is where you'll connect your business account and phone number.
Generate Your Access Token
In the API Setup page, you'll see an "Access Token" section at the top. Click "Generate access token" — this creates a temporary token you can use immediately. For production use, you'll need a permanent token (covered in the next step).
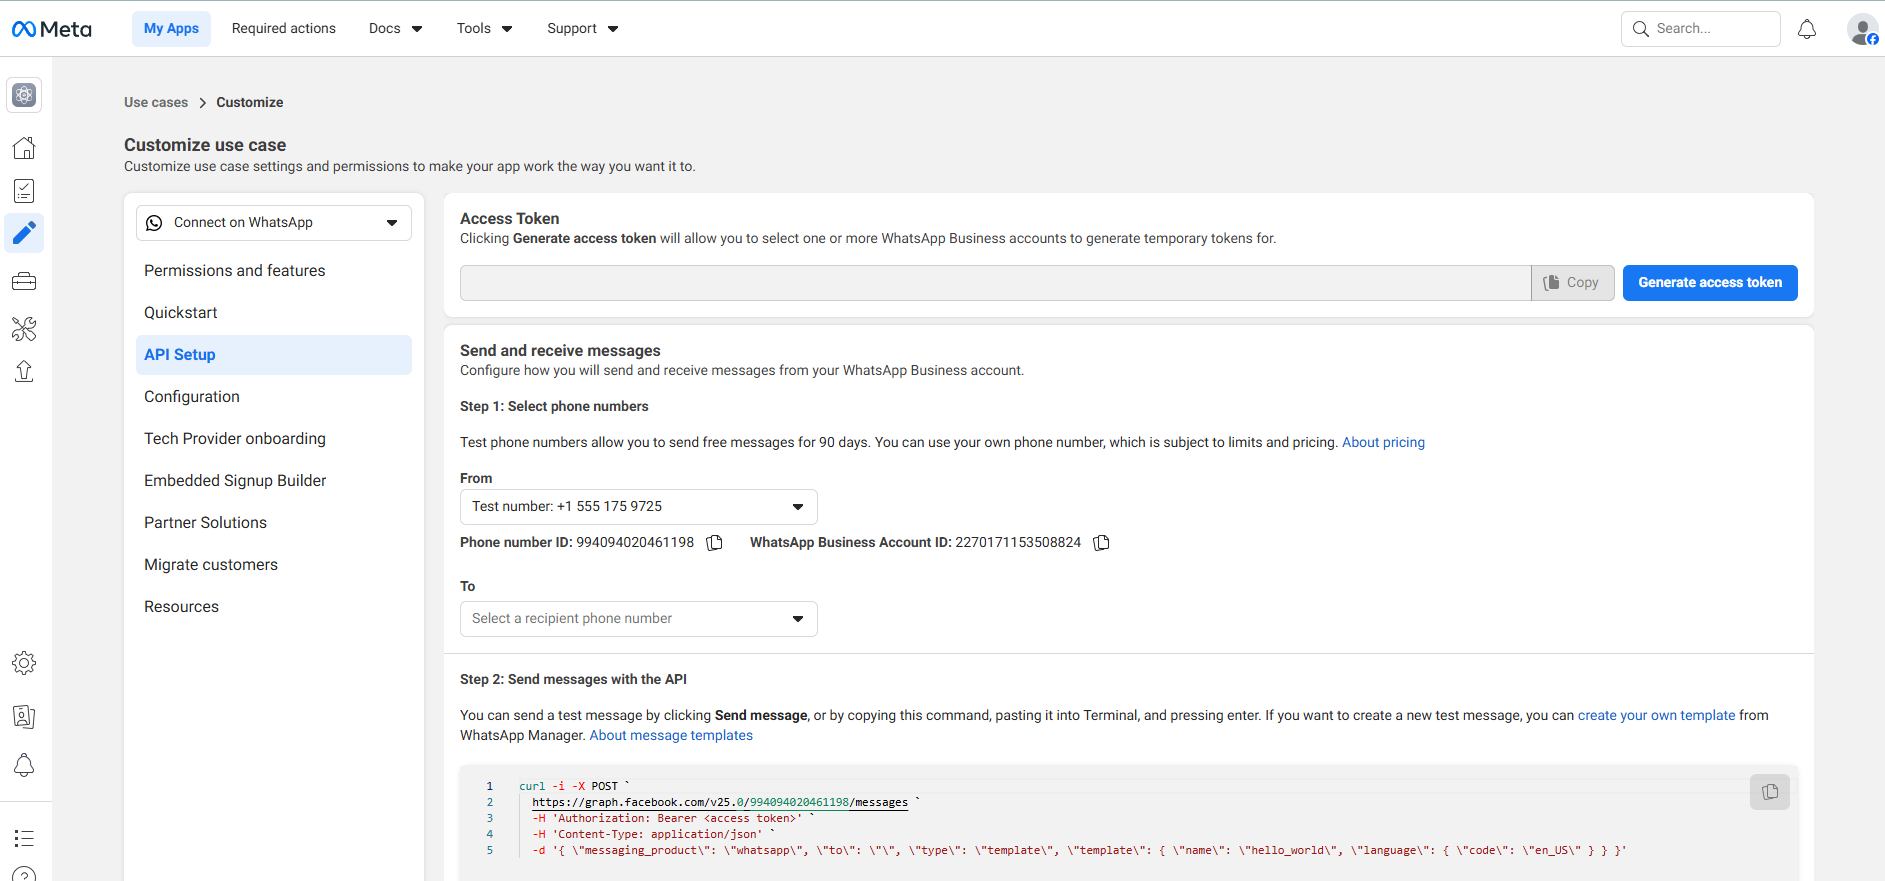
Copy Your Credentials
From the API Setup page, copy these three critical values. You'll need all three to configure Wagenius in the next step.
Found below the phone number selector on the API Setup page
Listed next to the Phone Number ID on the same page
Generated from the Generate access token button
Configure Wagenius CRM
Now log into your Wagenius dashboard and navigate to your WhatsApp Account Settings. Paste the credentials you copied in the previous step.
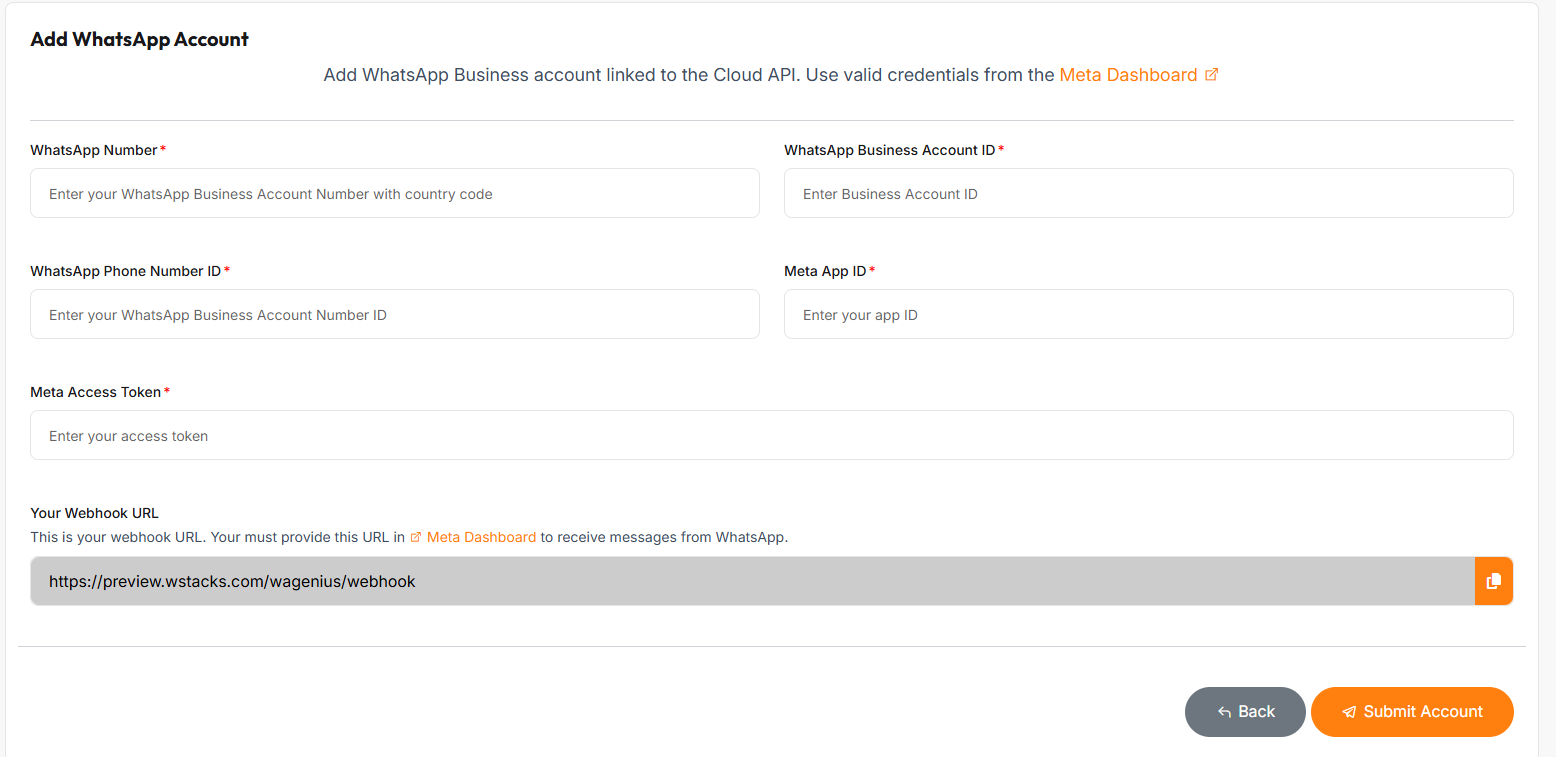
After filling in all fields, click the orange "Submit" button to save your configuration.
Set Up Your Webhook
Webhooks allow Meta to send message notifications to Wagenius in real-time. Go back to Meta Developer Dashboard → your app → Configuration tab in the left sidebar.
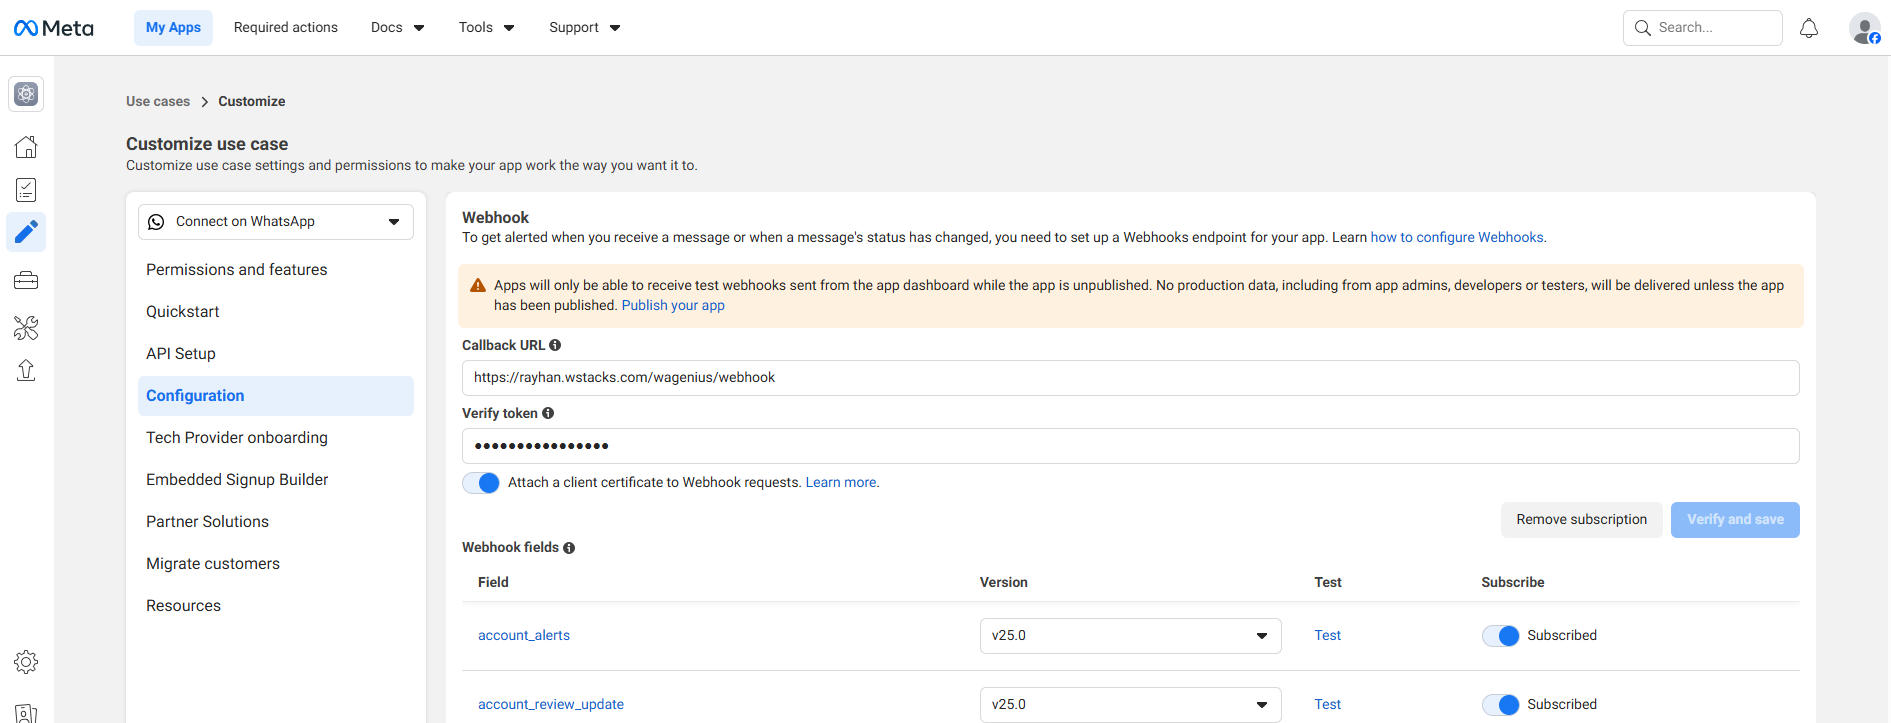
Get this from your Wagenius admin settings
Set any secure string — must match in both places
After entering both values, click "Verify and save". Meta will ping your webhook URL to confirm it's working.
Recommended Webhook Fields to Subscribe:
Test Sending Your First Message
Go back to the API Setup page and use the "Send and receive messages" section. Select a recipient number in the "To" field and click "Send message".
'https://graph.facebook.com/v25.0/YOUR_PHONE_ID/messages' \
-H 'Authorization: Bearer YOUR_TOKEN' \
-H 'Content-Type: application/json' \
-d '{"messaging_product":"whatsapp","to":"RECIPIENT_NUMBER","type":"template","template":{"name":"hello_world","language":{"code":"en_US"}}}'
Still Need Help?
Our support team is ready to help you get connected. Choose the option that works best for you.
Support Ticket
Create a support ticket and our team will respond as soon as possible. Track and manage your issues easily inside Wagenius.
Create TicketFull Documentation
Browse our complete knowledge base for all features and advanced settings.
Browse DocsReady to get started?
Join thousands of businesses using Wagenius to manage WhatsApp conversations at scale.
Open Wagenius Dashboard →